Guide
Set the shot first. Render the picture second.
Everything below uses one coastal rocket: a launch pad by the sea, firing beside its tower.
The preview holds the framing and the move. The take is the picture that comes back. Each screenshot below shows where that step happens.
Getting started
CraftWorld is a 3D director’s desk for AI video. You see the scene and the camera move before you decide to generate.
You can open the workspace, edit, play, and export a preview without signing in. AI Director and AI Render need a sign-in. For ideas, browse the gallery.
Editing, playback, and export are free. Credits are only used for AI Director and AI Render. The numbers are in Plans, below.
Workspace
Same rocket, two ways of looking at it. Switch Simple and Pro in the top bar. The pad stays put.
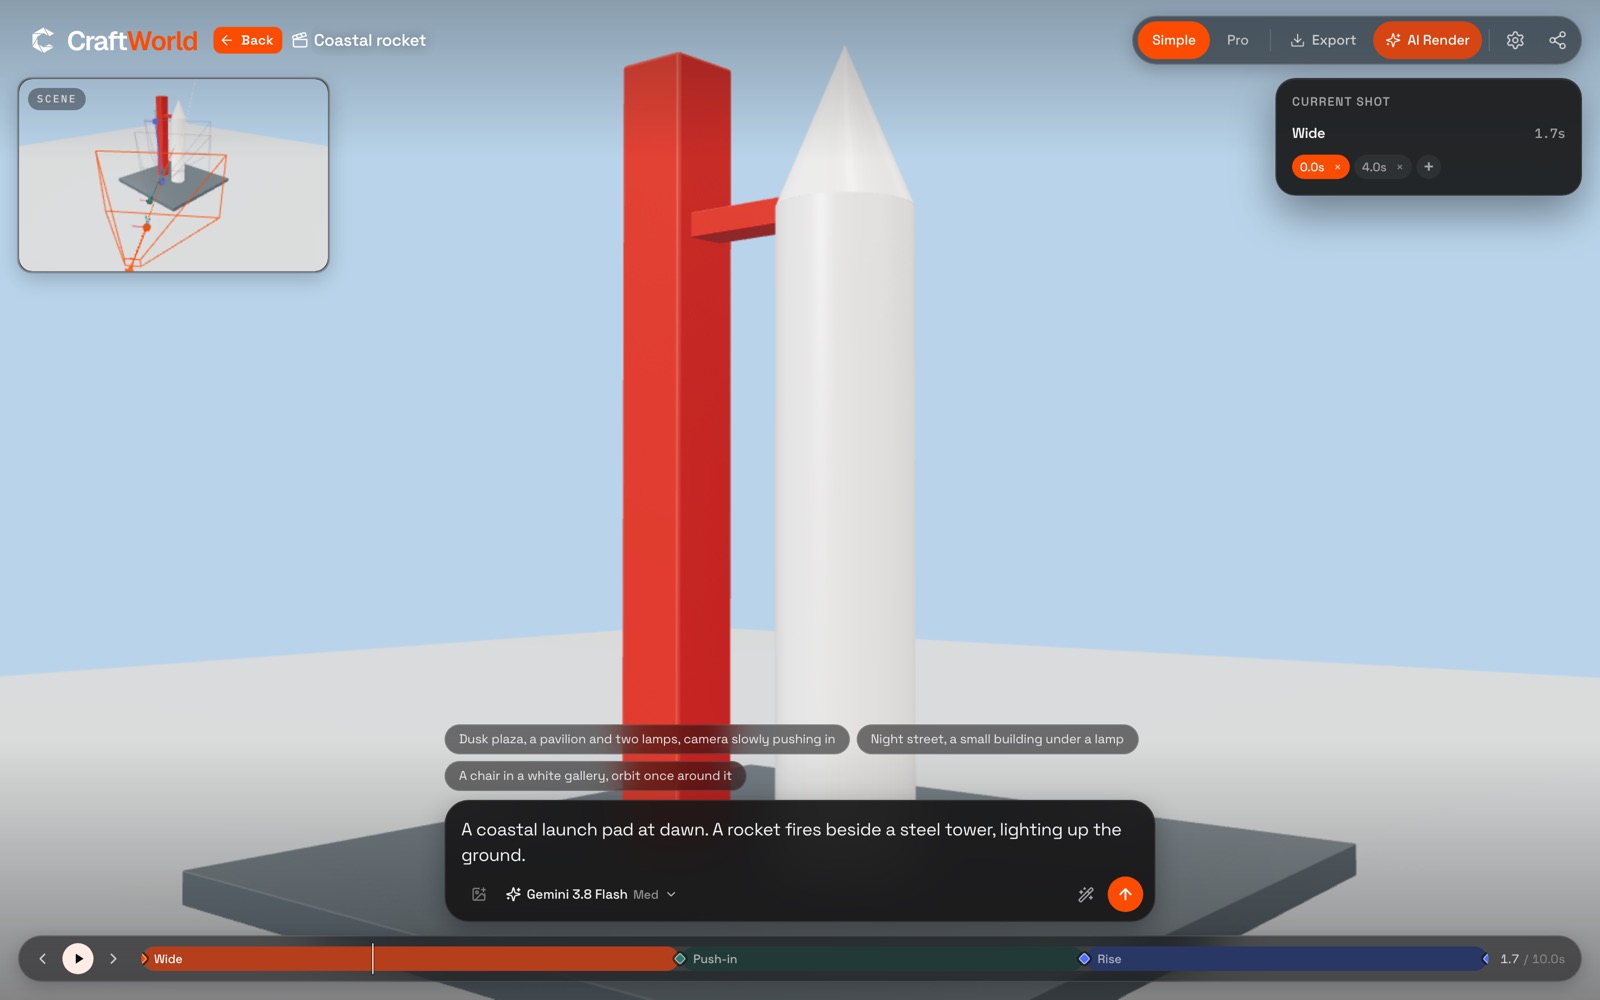
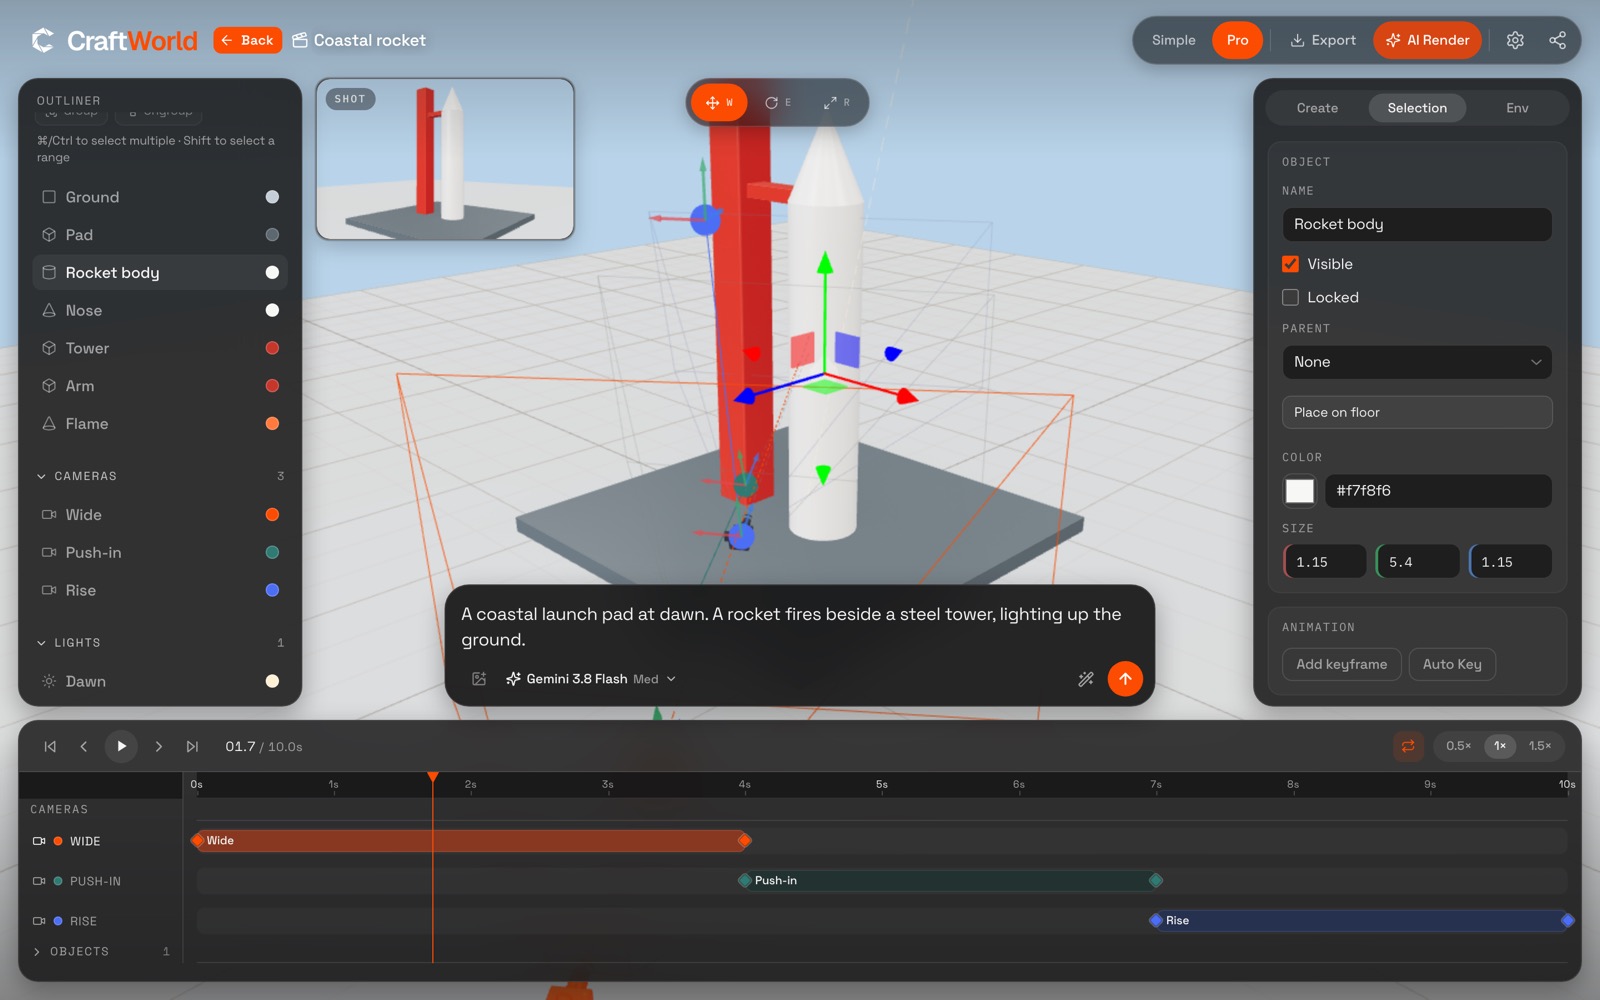
Both modes use the same AI. Both can export, open AI Render, and share. Settings cover language, appearance, and preview quality. You can compare a change, then keep it or undo it.
Directing
After you sign in, this line builds the pad. It is the text in the dark box on the Simple screenshot above. Once the scene is up, write only the change, such as “slow the push-in, and keep the rocket in frame.”
A coastal launch pad at dawn. A rocket fires beside a steel tower, lighting up the ground.- What it can changeObjects, lights, cameras, and animation. You can also change just this shot, or only the camera. If you attach a reference image, say whether it belongs on the rocket, the tower, or the ground.
- What it costsA turn spends director credits from that turn’s model usage. The amount shown before you send is the one that counts.
More on writing for the AI director.
Camera
On the Pro timeline, this rocket is already split into a wide shot, a push-in, and a rise. Play it through: keep the rocket in frame, and keep the camera out of the tower. Select a camera to apply one of these moves directly.
- DollyMove in on the rocket as it fires.
- TruckSlide off the side of the tower and open up the pad.
- OrbitTravel around the rocket.
- CraneRise with the rocket.
- FollowStay a set distance from the rocket as it climbs.
- HandheldAdd a little shake to the move.
- RevealCome out from behind the tower and find the rocket.
Preview export
To save this move as a video, use Export in the top bar.
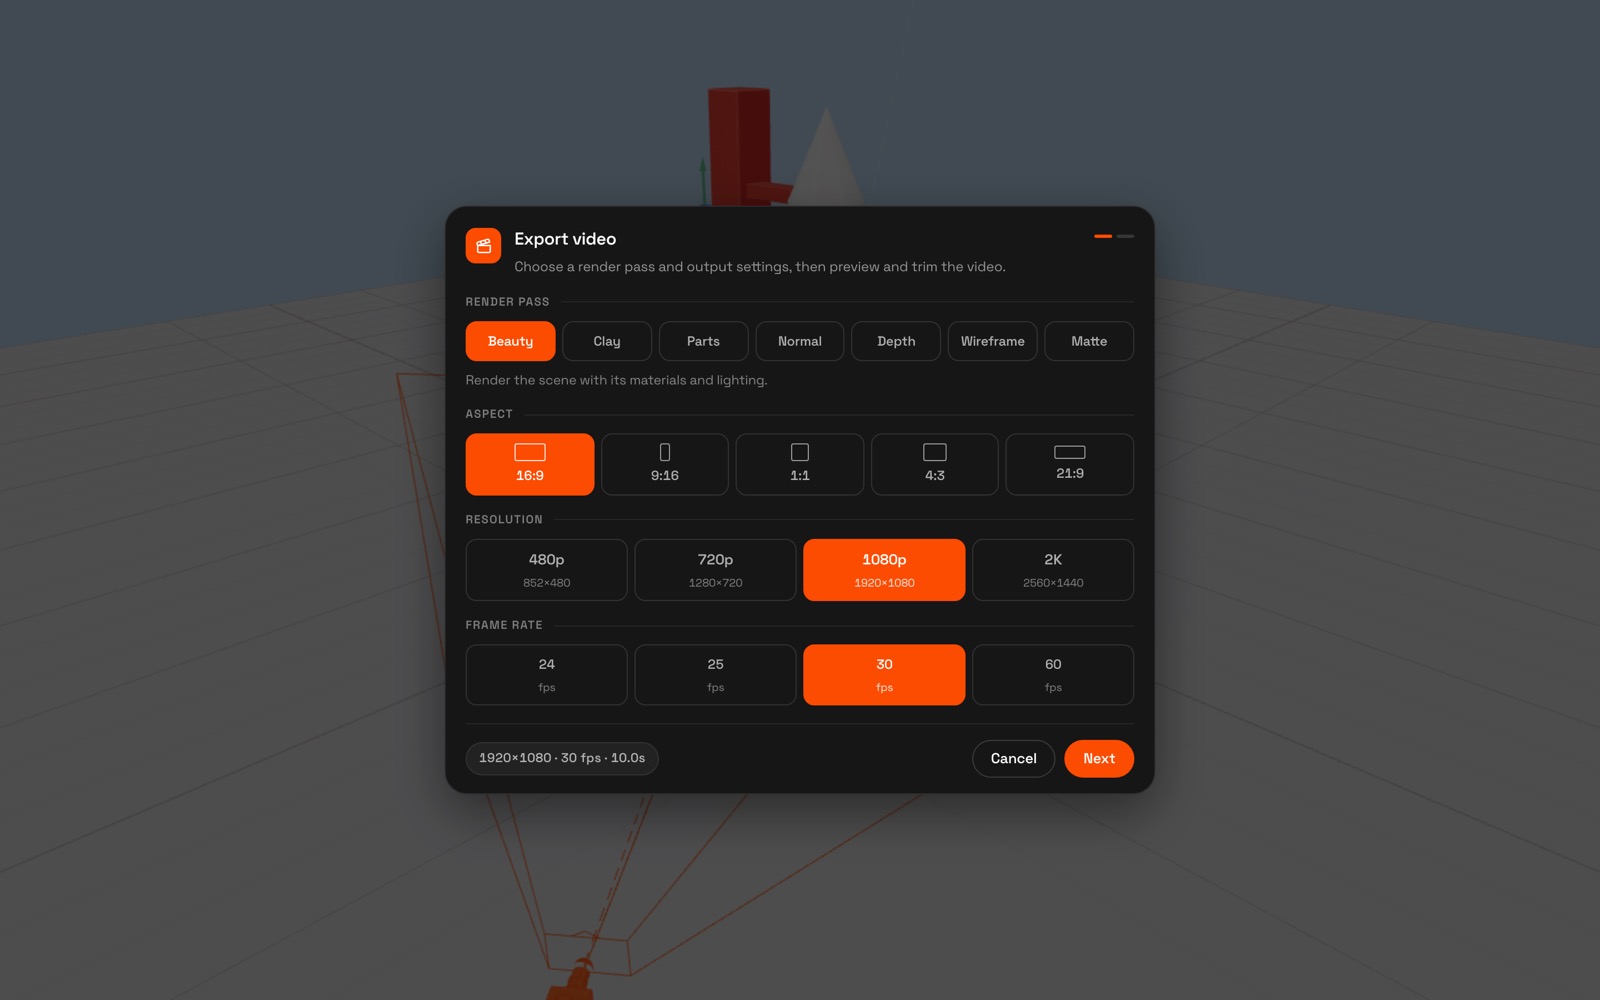
- The pass goes with the renderThe pass you pick is uploaded with AI Render. It carries the framing and the move.
- Matte stays hereMatte is a mask, white on black. It is only in Export, not among the AI Render passes.
More on clay previs.
AI Render
Open AI Render from the top bar. The rocket you just set is on the left. The take waits on the right.
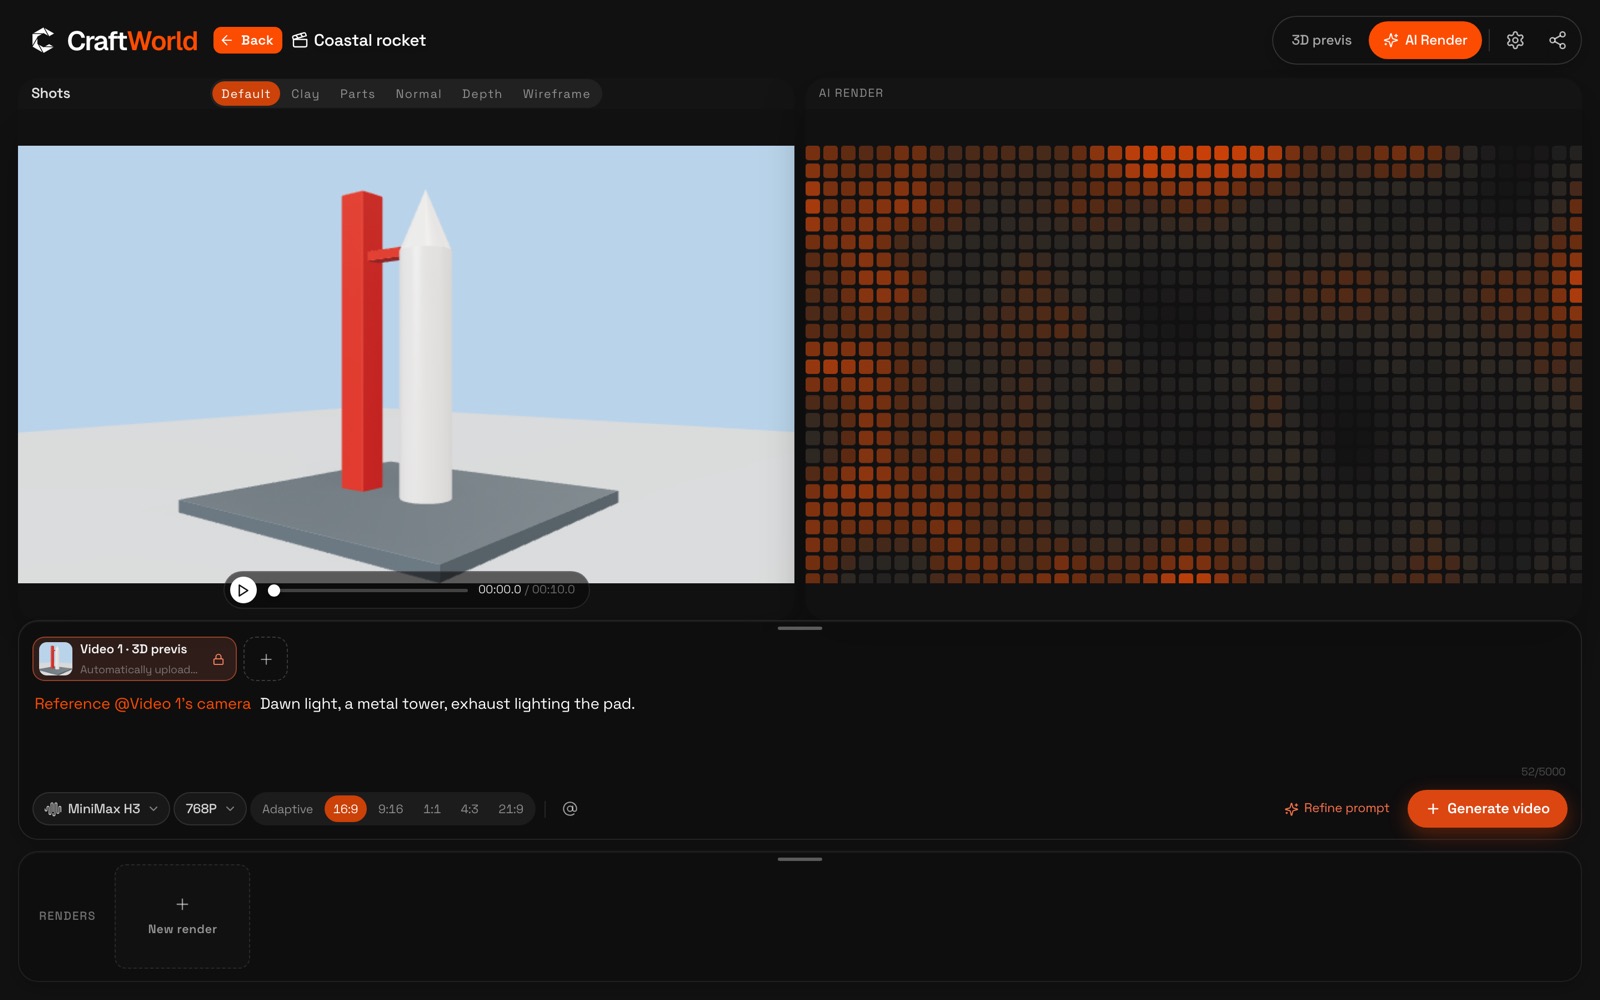
- The whole timelineYou can’t send only the ignition. The length has to sit inside what the model allows. If it doesn’t, generate stays off and the page says why.
- Add a referenceType @ to attach an image, another video, or audio. Refine prompt fills in materials and light.
- Several takesEach generation stays in the list at the bottom. Click one to play it on the right. Download the take or that run’s preview, delete it, or bring the description back to edit.
- The quote, and the sceneVideo credits follow the model, resolution, and duration. The quote is on screen before you submit. A take does not replace the 3D scene.
When the preview looks right, open AI Render from here. Sign-in is required.
Plans
- FreeAvailable now. Editing and previews are free. Sign-up includes a one-time 100 director credits and no video credits.
- Plus$19.90 / month, including 150 director credits and 400 video credits. Subscribe on the pricing page.
- Pro$69.90 / month, including 500 director credits and 1,700 video credits. Subscribe on the pricing page.
One-time credit packs are available on the pricing page when you need more credits.
- $4.90 · 30 director credits
- $12.90 · 90 director credits
- $29.90 · 240 director credits
- $64.90 · 600 director credits
- $12.90 · 250 video credits
- $27.90 · 600 video credits
- $64.90 · 1,500 video credits
- $139.90 · 3,500 video credits
Director credits and video credits are counted separately. A typical director turn is about 3 credits. A MiniMax H3 render at 768p for 10 seconds is about 20 video credits. Those are examples. The quote before you submit is the one that counts. Simple and Pro use the same rates. See Pricing, the Terms of service, and the Privacy policy.
FAQ
Product films, spatial walkthroughs, and story shots. Set the camera in 3D, then generate the picture.